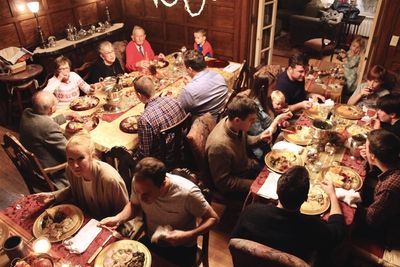
Thanksgiving Turkey
Roasts, Fowl, and Other Signs of Old Age
I once read a magazine article entitled, “How Not to Look Old.” It had lots of good advice like whiten your teeth, don’t wear a watch, and get a Brazilian. But one of the items on the list made me laugh: Don’t tell anyone you know how to make a roast. It seems knowing the dark magic of roast preparation somehow places you in the Dark Ages.
I now invite you to share in a secret of my sorcery: roast and fowl preparation is really, really easy. You can, literally, stick the hunk of meat in the oven for a few hours and you’ll please a crowd. If you add a few flourishes, all will bend the knee to her highness, the Kitchen Diva.
Perhaps the reason that roast preparation has been suppressed in our collective consciousness is that roasts can take several hours to cook. They don’t take several hours to prepare–we’re really talking minutes there. But you do have to think ahead. So availing yourself of the low cost, great taste, and immense popularity of fowl and roasts is just a matter of planning.
Here are some game plans (I can't reisit puns):
Pork Loin Roast
This is probably the least expensive roast to purchase, and the easiest to prepare. You can buy pork loin with or without a bone in it; the bone-in roasts are juicer. Just smother the loin with seasoning: salt, pepper and cumin are a delicious combination, or any seasoned salt works well. Throw the roast in a pan and place it in an oven preheated to 350°– no cover, no rack, no water. Roast for 20 minutes per pound of meat. Let the roast rest for a couple of minutes before you cut it against the grain.
Pot Roast
If you’re in the mood for beef, this is the most satisfying (and cheapest!) way to go. Cover the bottom and sides of a large crock pot with spray oil, then plop in your pot roast (you can even use a frozen one if you start early in the morning), and a cup of water mixed with an envelope of marinade mix. (My favorite is McCormick’s Brown Sugar and Bourbon.) Turn the crock pot to high, then return 4-5 hours later. The meat will fall off the bone, and you will eat too much of it.
Thanksgiving Turkey
Sooner or later, the lot falls on you, and you must make the Thanksgiving turkey. Many otherwise confident women panic at the thought of preparing “the bird,” as they conjure childhood memories of sawdust-dry turkey meat. Cooking a moist turkey is not that hard. Let’s just not let anyone in on our voodoo:
1 large turkey
2 sticks of room temperature butter
3 apples, cored and quartered
3 onions, peeled and quartered
sage leaves (optional)
salt and pepper to taste
1. Thaw your turkey out. Conscientious women thaw their turkeys for three days in the refrigerator. My mom always put hers out on the counter to thaw for 24 hours, and no one ever got sick— but you better stick with what it says on the label. Don’t forget there are probably two packets of parts tucked into the cavity of the bird. Make sure you take those out.
2. With your hands, separate the turkey’s skin from its breast meat. (Let your kids watch; it looks kind of creepy.) Spread both sticks of soft butter under the skin. This will keep the outermost meat moist, while the meat nearer the bone takes its time to cook. My son Harrison asked if we could also put bacon under the skin this year (guys think bacon belongs everywhere). I might just try it.
3. Stuff the apples, onions and sage inside the bird’s cavity.
4. Place the bird in a large baking pan, and cover it with aluminum foil.
5. Cook at 350° for twenty minutes per pound. Remove the aluminum for the last 30 minutes of cooking.
6. Place the bird on a channeled cutting board or rimmed cookie sheet, and let it stand for twenty minutes before carving. (Don’t worry about carving it the “right” way. Nobody really cares.)
7. Keep all the buttery, fruity, oniony drippings to make the best gravy ever.
The Best Gravy Ever
When I first got married, my husband’s grandmother and national treasure, Esther, offered to share with me her family’s recipe for gravy:
“First pour about 4 ounces of white wine,” she instructed.
“Does this go in with the turkey drippings?” I asked.
“No. Drink it. You’ll need to fortify yourself for gravy-making.”
While Grammy’s gravy was delicious, mine doesn’t require any fortification. It’s simple and very good. (If you do pour a glass of wine, toast Grammy!)
1/2 cup flour
2 cups milk
all the drippings from the turkey
1. Leaving the drippings in the baking pan, place the pan across two stove burners and turn the heat on low.
2. Mix the milk and flour together in a measuring cup and whisk with a fork.
3. Slowly add the flour and water mixture to the drippings and stir constantly.
4. If the gravy seems too thick, add more milk. If it seems too thin, make some more flour-milk mixture and add it. Salt and pepper to taste.
Your turkey will be moist enough that you won’t need gravy, but you’ll be glad you made it.

My little secret: preparing a turkey is easy. (Don't tell them--they think I'm magic.)
Cookie Policy
This website uses cookies. By continuing to use this site, you accept our use of cookies.